The 2007 US Outdoor FF Nationals are now history, and I feel very lucky that I was there to be part of the fun and excitement. I believe this year's NATS were a clear indicator of the future of handlaunch gliders.
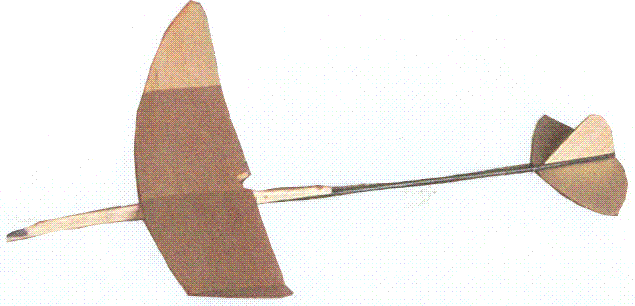
There is a new style, or way to throw handlaunch gliders, which has been developed over the past few years. There are two ways to throw a glider, one is called javelin. A javelin throw is similar to throwing a baseball. The new way, or less traditional way, is called tip launch or discus throw. A tip launch throw is one where you hold the wingtip of the model and spin about a vertical axis to throw the model.
At the NATS this year, about 70% of the models that competed were tip launched gliders. The top nine places at the NATS this year were won by tip launched gliders. Tip launched gliders appear to have an advantage. Typically, a tip launched glider has a 36" wingspan, or larger. They are reaching heights of at least 70-140 feet. It is very impressive to watch them being launched. For comparison purposes, a javelin style model typically has around a 20" wingspan. The average launch height is around 50 feet. The top javelin throwers can achieve heights of up to 100 feet.
The contest is not who can get the highest, but rather who can stay up the longest or max out (2 minute flight time). Even the large tip models that are thrown to 140 feet in height still can't stay up for 2 minutes without a thermal. What the tip launch method has done, is enabled more individuals to throw closer to the launch heights of the top throwers. A tip launch glider is typically thrown high enough that the chances of catching a thermal are increased. This seems to have raised the level of interest toward handlaunch gliders and has given some of the older modelers a chance to be very competitive. This year's event had approximately thirty contestants. I believe this number was higher than the past few years.
Dick Peterson is a good example of an older modeler who placed very well. He came in fourth place this year flying a tip launch glider, and with a little luck, he could have even won the event. It would have been unlikely that he would have done as well if he had been throwing javelin style. Dick's launches had good height, but not quite as high as other competitors. His ability to find good air and the consistency of his throws allowed him to place high against some very strong competition.
It was also interesting to note that Lee Hines came in sixth place, throwing tip launch style, flying a model he used to throw javelin style. Lee made some changes to the model, but it had a smaller wingspan than most tip launched gliders that he competed against.
The top two places were won by Tim Batiuk and Jim Lewis, who are both good javelin throwers. They choose to fly tip launch. Their tip launches achieved good heights. Bruce Kimball, who won last year and finished third this year, was achieving good height. There were many other competitors who also achieved great height.
Stan Buddenbohm's Dynamo Hum II design and kit was used by five of the top ten places. It definitely has a good climb, a good transition, and a great glide.
Two of the top ten places did not use a peg. They placed sandpaper where the peg would usually be placed. Watching their throws, the absence of a peg does not appear to negatively affect their launch height, transition, or glide. In fact, there may have been a slight improvement in all three areas.
In my opinion, as more people are introduced to the tip launch style, it will become the new standard. I suggest that all modelers build a tip launch glider, or modify an existing javelin model, and join in on the fun, it's a blast!
To modify an old javelin model to the tip launch standard, the following steps are my suggestion.
- The stab and rudder is replaced with a Y-tail assembly. Refer to the design of the Round-A-Bout for an example of how this is done.
- The front of the wing is raised, to change the incidence to approximately 2° positive.
- The dihedral joints in the wing are strengthened. To accomplish this, I suggest the use of plywood to re-enforce the joint, with a light layer of fiberglass over the dihedral joint. Refer to the design of the Round-A-Bout for an example of how this is done.
- A peg or sandpaper is added to the left wingtip, so you can grip the tip to throw.
- The model is trimmed out to circle right.