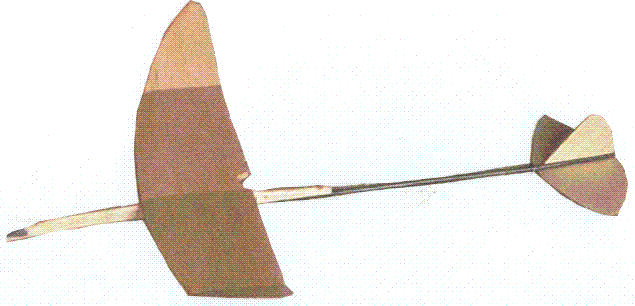
If there is any real secret to making a successful glider, the one word answer is “incidence”. My good friend and great modeler, Stan Buddenbohm, taught me this back in 1999. I refer to incidence as the relative angle between the wing and the elevator. This angle is very important in the launching phase of the glider flight.
Gliders in general, are hard to trim or setup because of the very large velocity differences during the typical flight. During the launch, the glider is probably going 50-150 mi/hr! During the glide portion of the flight, the glider is traveling around 5-15 mi/hr. This is a large difference.
One of the biggest negatives about gliders is that disaster can happen on the first hard launch. It is very disappointing to work hard, build a model, and then watch it destroy itself on the very first launch. You can test glide it but the moment of truth is that first hard launch. I’ve lost many models, because the incidence was wrong. Stan convinced me that adjustable incidence must be built into the design. Since then the number of models I have lost has decreased.
The perfect incidence angle is typically zero-zero or just very slightly positive. A wing being at a negative angle of attack compared to the stab is sure to lead to disaster. If this angle is negative, then after the model reaches the top of its flight, the nose of the plane will point down. The plane will nosedive into the floor. Now, too positive of an angle translates into the plane doing an inside loop, which is also undesirable. For a great launch, the incidence must be right. Putting tab in the elevator (up or down) can somewhat corrects this issue, but it is not a good substitute for having the incidence perfect.
How accurately must you build the plane, in order to have the incidence correct? Well, I believe for a 3” or 4” wing chord, the wing must be glued on to an accuracy of .007”. That is the thickness of two or three human hairs. I have not been able to build to these accuracies; therefore I must be able to adjust the incidence of the model.
Here is what works for me. Build the model as best you can and try to get the incidence slightly positive. I believe with a good flat working surface and a micrometer you can glue the wing to about .015”. Now, I want to make sure I have positive incidence. I build the model with the front of the wing .020” higher on the front of the pylon compared to the back. This assures me that the model will not nosedive into the floor on the very first launch. The model should go to the upside but that is OK. Typically, it will not destroy itself with this setting.
Here is where the adjustment comes in. If the glider has positive incidence, as you launch the plane, it will go up fairly well. Instead of nose diving into the floor, the glider will do an inside loop at the top. Decrease the incidence until the model loses the inside loop. After 5 or so launches, you should have a good transition at the very top of the launch.
For Category III/IV models, I just put a small screw in the fuse to hold on the wing and allow for adjustment of the incidence. For Category I/II models, weight is an important factor, and you really cannot afford to make something that allows for adjustment. I build the plane with a small pylon, which is glued on with dissolvable glue like Duco Cement. To adjust the incidence using this method, I dissolve the glue with acetone, sand the pylon, correcting the incidence, and then re-glue. Another method you can use is to hold the pylon on with tape. After you have the incidence right, remove the tape and glue it in place. Dissolvable glues, tape, shims, screws, whatever system you choose to use ……but
Plan to adjust the incidence in your glider.

