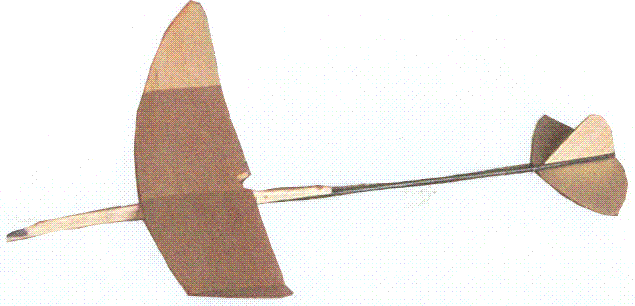
Indoor gliders are gliders which are flown inside a building. The AMA has 3 events (classifications) for indoor gliders.
- Hand-launch gliders - basically, a glider with less than 100 in^2 of wing area which is thrown in the air like a baseball.
- Standard Catapult Gliders - basically, a glider with a 12 inch wing span and a 3 inch wing cord which is shot up by a rubber band.
- Unlimited Catapult Gliders - basically, a glider with less than 100 inch^2 of wing area shot up with a rubber band.
These gliders can be flown for national records depending on the ceiling height of the building. The ceiling heights are:
- Category I - less than 26 feet 3 inches.
- Category II - 26 feet 3 inches to 49 feet 2.5 inches.
- Category III - 49 feet 2.5 inches to 98 feet 5 inches.
- Category IV - Over 98 feet 5 inches.
For category I and II sites, a type of glider, which is referred to as a flapper, seems to perform the best. Category III and IV sites, the typical fixed-wing glider seem to be the best way to go.
The flapper design - a glider which is referred to as a flapper is a plane in which the back portion of the wing is designed to move up (lift up) during the high-speed of a launch.

The idea behind this design is to have the air foil actually change shapes during the launch, making the plane have less drag during the high-speed portion of the launch. As the glider slows down, the back of the wing drops down (like a conventional flap on a wing) creating higher lift and also more drag as the glider slowly returns to the floor. It is very hard to get a flapper design higher than 50 feet, therefore they are not commonly used in category III or IV sites.
Commonly Used Terms:
Most glider flyers refer to three different portions of a glider flight as:
- The launch (this is where the model is released from the catapult and reaches its maximum height)
- The transition (this is where the model changes between the glide and the launch)
- The glide (this is where the model is gliding down, usually a nice left-hand turn)
There is also the glider pattern. The typical flight for most people used for gliders is right-left. This is geared toward a right-handed person, where you hold the launch stick with your left hand and the model with your right hand. Or, for the hand-launch glider, you are throwing the glider with your right hand. You launch the model a little bit off to the right side of your body. The flight path of the model should be up about 85 degrees and the model should make a 180 degree right turn on the way up to the model's maximum height. At the maximum height, the model should be at steady-state glide speed and start turning in to the left. It should continue in a left-hand circle until it reaches the floor. This flight pattern is referred to as the right-left pattern. For sites, which are small, a right-left pattern might not be the right way to go. You will end up hitting the walls too often. Then you may want to consider a left-left pattern or a right-right pattern.
The term incidence is used very often. Incidence is basically the relationship of the angle of the wing compared to the angle of the elevator. Since you want the plane to travel a straight line during the launch portion of the flight, you need to set the angle of the wing the same as the angle of the stab, referred to as zero-zero. If the wing is at a negative angle of attack, compared to the elevator, then the glider will nose-dive into the floor most likely to be broken.
Some General Tips:
At first glance, it appears the sport should be simple and easy. If you try it, you'll soon find out that this is not the case. It is hard to believe something so simple can be so complicated and challenging. What we are referring to in this website are not "toys" but actually high-tech flying machines which use, in their construction, space-age materials. The easiest way to turn good times for a particular building is to get to the very top of the ceiling. The air is typically "better" up at the ceiling of a building so a glider's particular design is made for the building or category site in which it is planned to be flown. There are some very good glider kits and glider designs available, but, if you are like us, you'll soon discover that part of the "fun" is in making your own design or modifications to an existing design. Soon, you'll be more interested in basic materials like balsa wood and carbon fiber. The biggest mistake most glider flyers make is having the incidence of the plane incorrect.

