Introduction
This document will guide you through a process on how to make a SO Balloon Launch glider, like the one which is presented on this website. This is not the only way this glider could be constructed and it may not be the best way either. But it is how I, who have been building model airplanes for over 25 years, would go about constructing one.
Materials needed:
The following list of materials which are needed to construct a SO Balloon Launch Glider. This is referred to as a Bill of Material or BOM.
- Plans for the glider your planning to construct
- Ball Point Pen
- Scissors
- Razor Blades
- A Sink and hot water
- A Flat Building Surface
- Soldiering Iron
- Sanding block or blocks
- Some small weights
- 1/4" plywood
- 1/32" Aluminum Sheet
- Tin Snips and a metal file
- Duco Cement
- CA Glue
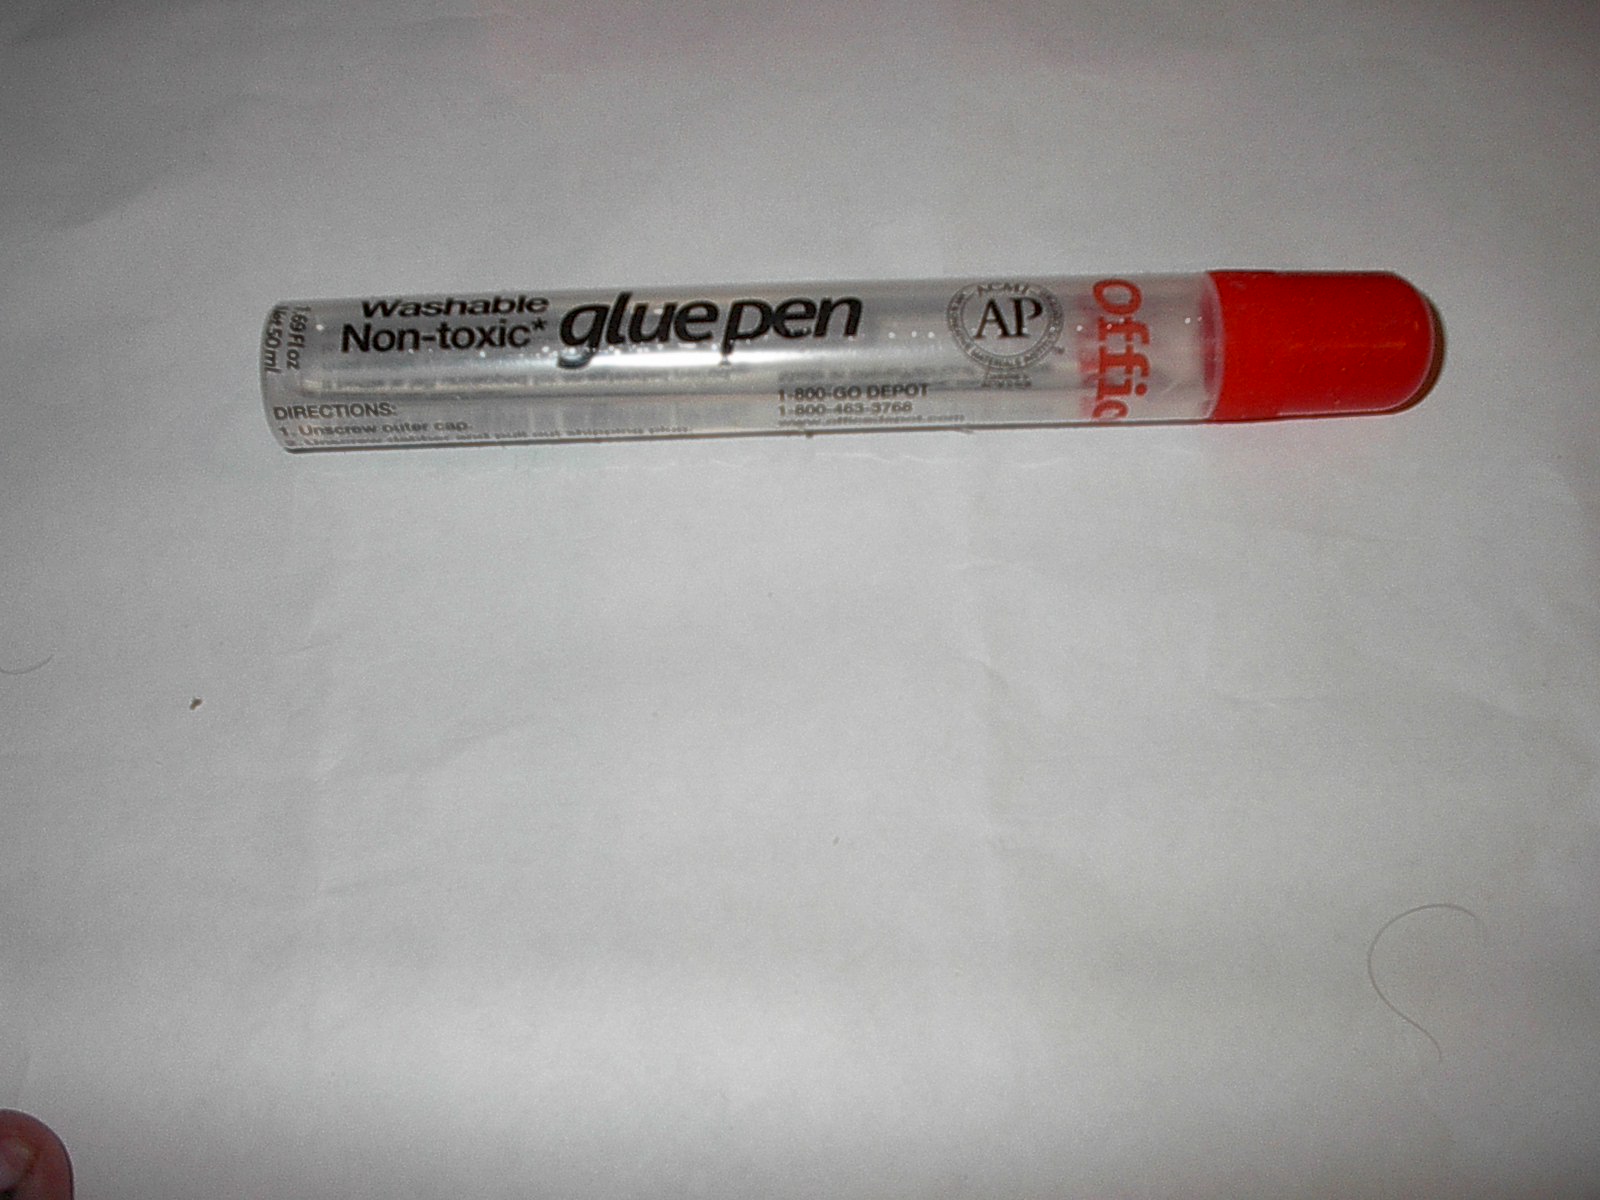
- Office Max Glue pen
- Wax
- Sheet of 1/32" thick balsa
- Sheet of 1/16" thick balsa
- Sheet of 1/8" thick balsa
- Sheet of 1/4" thick balsa
- Light Plastic Covering
Introduction to Balsa Wood and Gluing Techniques
First, you need to have a general understanding of the materials being used to construct a great flying model. Since the model is basically made from balsa wood, you must understand the properties of Balsa wood.
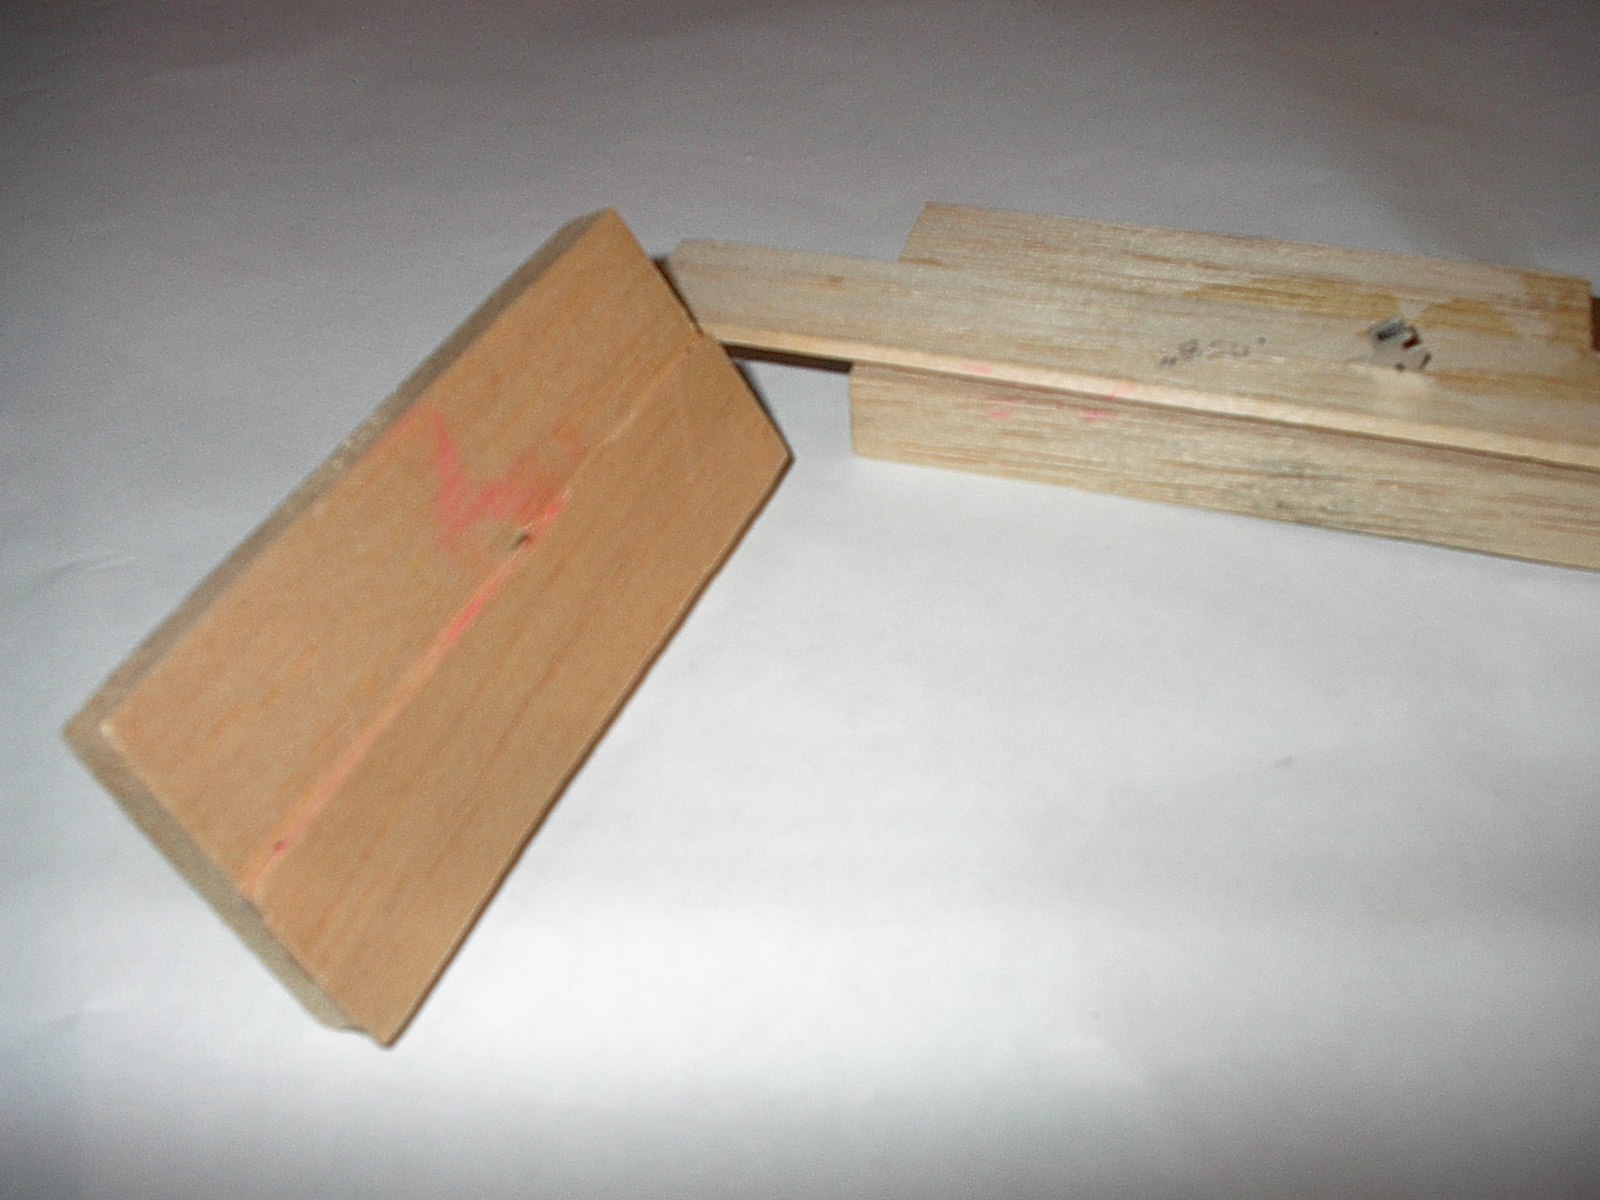
Balsa is not an isotropic material like steel. An isotropic material is one which has the same properties in all directions. Some good examples of isotropic materials are steel and aluminum. Wood has grain, and therefore the properties of wood in one direction, like in the length of a sheet of balsa, can be very different from the properties of the width of a sheet of balsa. You can find more information about balsa wood properties on this website. A good modeler takes advantage of these properties when constructing a model. You must also understand the grain of balsa wood. Balsa wood grain is described by three types, A-grain, B-grain and C-grain. If you look closely at a sheet of wood you can typically tell if the sheet is A, B or C grain.
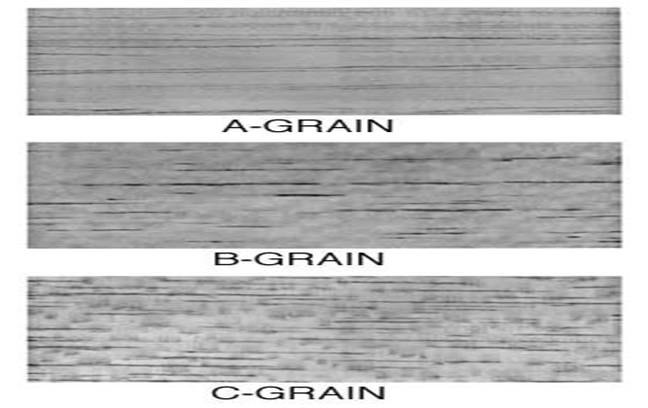
I also look at the end of the sheet to determine what grain the sheet has. You can look at the picture below to understand how the tree rings should look at the end of the sheet.

A-grain is the most flexible and is what you want for the wing spar. C-grain is the stiffest in torsion and you should try to use C-grain to construct the elevator and rudder. C-grain resists twisting and warping, but if you can’t find C-grain, you can still use A or B grain balsa. Remember, every sheet of balsa is different, and even within a 36” sheet of balsa, the properties could be different.
The other important fact about balsa wood is its density. The lightest balsa will have a density of around 4lbs/ft^3 (cubic foot). The heaviest balsa has a density of around 25lbs/ft^3. The density of a sheet of balsa can easily be measured by determining the sheet’s weight and volume. Density is weight divided by volume. Remember to exercise caution while measuring and converting units. Modelers refer to balsa density as in terms of some number like 5 lb wood, but what they really mean is 5lbs/ft^3.
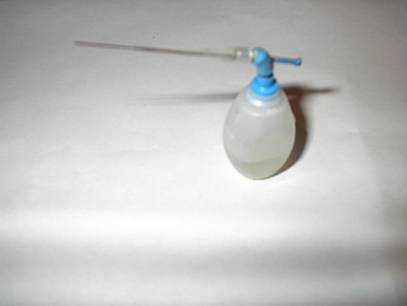
You need to understand basic gluing techniques. A glue joint between to pieces of wood must mate very well. No large gaps greater than .010” should be allowed if you want a strong link. Put glue on both mating parts and let the glue dry. Then, re-glue one part and mate the parts closer together. The parts must stay still for at least 30 minutes while the glue dries. A glue dispenser, shown below, can make construction more convenient, as it allows you to thin the glue, which would make the plane lighter. You could substitute this system by using a toothpick to apply the glue to the wood directly.
Tools Needed:
I find constructing some general tools is also useful. I recommend you construct a balsa stripper. Balsa strippers can be purchased at hobby stores, but I have never gotten one I purchased to work as well as the ones I construct. Below is a picture of a few wood strippers I built. You can use our instructions to build the stripper, from our article: Simple Rudder Strippers for Catapult Glider Bands.

Homemade Balsa Strippers.
Another View of The Balsa Stripper
I use fine, double sided razor blades when stripping wood. You can purchase them at any store that sells razors. All my strippers are made from scrap balsa wood and a little CA glue. You can break these into any shape, and even attach a masking tape handle, to make it a safe, general purpose, cutting tool.
The other tool I build is a form to shape the wing spar. Just cut the shape of the wing out of ¼” thick plywood. This will be used later in the article to form the wing.
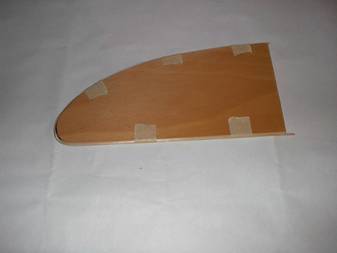
Wing platform used to form the wing spar.
The next tool is a rib form. This is made out of a piece of a 1/32” thick aluminum sheet. The plans show the rib shape. Copy that shape on to the aluminum sheet and cut out the form using tin snips. Then, smooth the form with a metal file. See the picture below for the rib form I constructed.
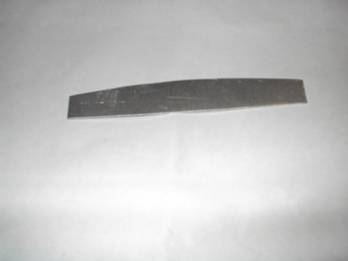
Rib form for cutting wing ribs.
The next tool is a covering frame. This is made from ¼” thick balsa and CA glue. See the picture of the covering frame below.
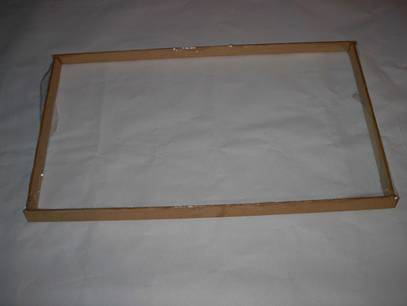
Covering Frame.
Construction
Start by constructing the wing. First, you need to use a wood stripper to cut several 1/16” thick strips of balsa. The plans call for 6lbs/ft^3 balsa, so a 3”X36”X1/16” sheet should weight about 10.6 grams. If the sheet is heavier than 11grams or lighter than 10 grams I would try to find another sheet of wood to make the wing spar from. Remember, you are trying to use A or B grain wood, not C grain for the wing spars. Before stripping the wood, mark the top of the balsa sheet at both ends with a ball point pen. This allows you to know the ordination of the 1/16” square strip. Make about 3 times as many strips as you will need. They all won’t come out perfect, pick the ones that look the best.
We want the balsa spar to be very flexible to bend it around the form, but we also want the spar to be very stiff in the vertical direction. You can try bending the spar by hand, to feel how the spar should be orientated. Another option is to build a simple spar tester, shown below. I don’t think a spar tester is essential, but it could be useful. Keep track of how the balsa bends, so you can use this information later in the construction.
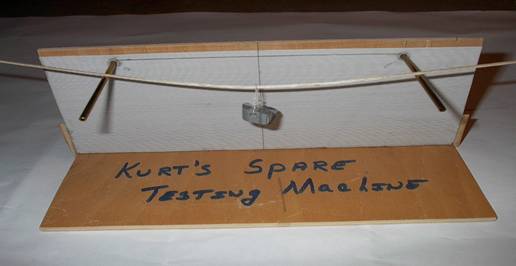
Spar testing machine with a spar being tested.
Next fill your sink with hot water and place the wing spars in the water, and let them soak for at least 60 minutes. Once the wood is thoroughly wetted, stack up about three of them together, getting the ordination of the wood correct. Put the wood on the wing platform form at the center-leading edge and hold firmly down with masking tape. Keep tension on the wood, and start wrapping the wood around the form. Every few inches, add a piece of masking tape to hold the wood firmly on the form. Once complete, let the form and balsa spars dry for 24 hours, or bake them in an oven for 1 hour at 250°F.
Next, make some ribs by using the aluminum rib form mentioned earlier, as well as a sheet of 1/32” balsa. The plans call for C-grain and 6 lb wood. You can cut many full length ribs by just placing the rib form on top of the sheet of balsa, cutting along the form. Then slide the form down 1/16” and cutting along the form again. Pick out the good ones and throw the bad ones away.
Now, lay the full sized plans on a flat table. Rub a little wax at the spots where you will be making glue joints. This will allow you to get the wing frame off the plans after everything is dried. Using the plans as a guide, cut the ribs to the correct length (wing chord). Now that your wing spars are dry, take them off the wing platform form and place over the plans. Use small weights to hold wing spar in place. Put a small drop of glue at each end of the ribs and place them on the plans. Again use weight to sandwich ribs and keep them standing up. Allow the wing frame to dry for about 1 hour.
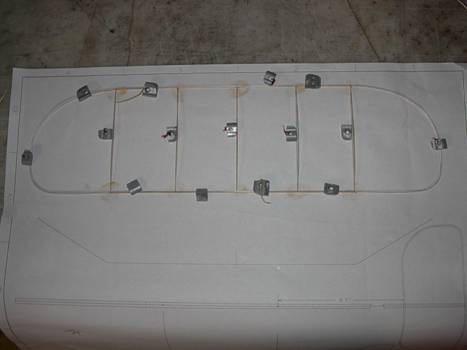
Wing frame waiting for glue to dry. | Glue Pen - Purchased from Office Max.
Remove wing frame from the plans. Sometimes a razor blade needs to be slid between the wing frame and plans to release the frame. Set the wing frame aside and prepare to cover the wing.
Now use Penny Plane (PPP) film. If you don’t have any, Roy White sells this film for $10.00 per roll.
ROY WHITE
1025 CEDAR ST.
CATAWISSA MO. 63015
Use a covering frame when working with this film. Glue the film to the frame by rolling out the film on a flat table, carefully pushing/working out the winkles. Then, apply the glue to the frame. I use a glue pen from Office Max. Turn the frame over and place it on top of the film which is rolled out on the table. Let it sit for a few minutes, then carefully turn it over. The covering should now be attached to the frame. Use a small soldering iron to melt/cut the film from the roll. Now you should have what looks like a window frame with the film attached. Next, put some glue on the wing frame. Just carefully rub the glue pen over the wood. Next, turn the wing over and place it on the film/frame. Lightly go around, pressing the wing frame to the film. Let it sit for a few minutes, then take your hot soldering iron and run it around the wing frame. If the soldering iron gets too hot, the film will melt too much and burn the wood. If the soldering iron is too cold, the film will tear. It is a little tricky (unless you can set the soldering iron temperature) to cut the film. I recommend warming up the soldering iron, and trying to cut the film on a scrap piece. When it is cutting well, start cutting around the wing frame. Stop at the halfway point and unplug the iron. Clean the soldering iron and start the process again later. Do not try to shrink this film.
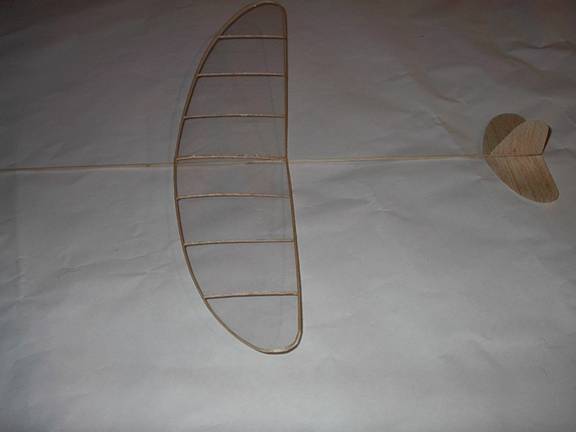
Now that the wing is covered, add the wing dihedral. Carefully cut the wing spars at the joint, propping up the wing at the wingtips with some scrap balsa to the correct height, and then apply some glue to the joints. Allow the glue to dry for 1 hour. Now the wing is completed.
Next, build the elevator and rudder. Cut out the platform shapes as shown on the plans, from a 1/32” thick C-grain balsa sheet. The density should be around 5 lbs/ft^3. Here if you can find lighter wood like 4 lbs/ft^3, use it. Just make the parts a little thicker. To understand how to sand the parts to the correct thickness, read the Basic Sanding Techniques document on this website. The numbers on the plans indicate what the thickness of the part should be at that location.
Next, the fuse should be constructed, following the plans for the shape, balsa grain, and density.
Finally, you need to glue all the parts together using Duco Cement. Glue the elevator on the fuse first, then let it dry for 30 minutes. Then, glue the rudder, making sure it is perpendicular to the elevator. Finally, glue the wing on to the fuse, making sure the wing is not skewed on the fuse and the wing and elevator are level with each other.
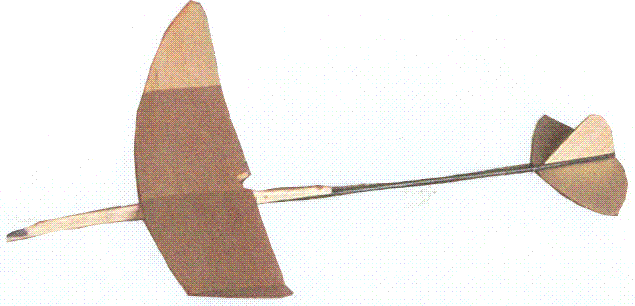
Below is what the model should now look like.
Your finished model.
Good Luck. I hope this document was helpful.
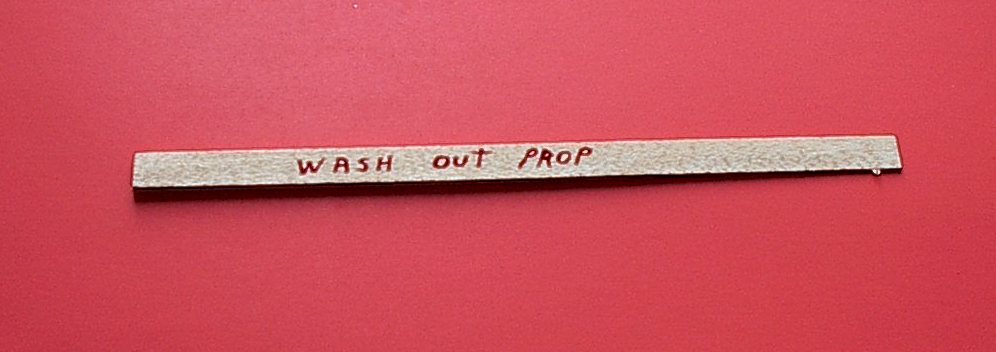
Footnote: On our plans, we show a washout gauge as an option to add washout to the wings. Below, is a photo of such a device. It goes under the trailing edge while constructing the wing with the .75 to the wingtip and the taper to the center root of the wing. By building the wing on top of this prop, you will have washout in the wing if you desire it. We have an article on this website that explains washout.